How to setup cheap rain barrels
12.6 years ago cheap, rain barrels, water
Living in the rainy Pacific Northwest I have considered setting up some rain barrels to save a little on my water bill, but to also provide a water outlet to an area in my garden where one is not available.
The biggest inhibiting factor of doing this sooner was cost, typically rain barrel kits cost at least $100 and though as you can see below might be a little more aesthetically pleasing this is quite a bit of money to spend for something I am going to hide behind my garage anyway I went for a much cheaper option with a little do-it-yourself.
Materials Needed
- 55 gallon food grade plastic barrels X 2
- 3/4 in. Slip x MHT PVC Fitting
- 3/4 in. Male Terminal Adapter
- 3/4“ PVC Tee connector X 2
- 3/4” PVC elbow connector
- 3/4” PVC end cap
- Hose Barb Adapter (5/8” Barb X 3/4” MIP)
- 5/8” plastic tubing
- 3/4” PVC ball valve (get a second one if you want to be able to add more barrels without draining out all the water)
- 1.5” length of 3/4” PVC pipe X 2
- 2” length of 3/4” PVC pipe X 2
- Vinyl plumbers tape
- PVC primer/cement
- Cinder Blocks (at least 2 for each water barrel…I went with 6 for each barrel for additional water pressure)
- 4”X4” Lumber (8 foot)
Construction
Knowing Pascal’s principle I wanted to take advantage of all the height I could safely get. I chose to elevate my rain barrels by taking cinder blocks 2 wide and 3 high. I then place two 4”X4” lumber cut at 4 foot lengths to provide a few additional inches bust also provide some room for my connections which I will explain below.
Now I have a firm foundation not it is time to get these barrels hooked together so I can get maximum water pressure and access to the water in all of the barrels.
The caps on the barrels (pretty common) I picked up had a nice feature of including some nice threads on the inside of them. This provides me a nice 1 inch thread I can get a nice tight seal. The only problem these are sealed.
Not having a drill bit just under one inch in diameter I used a pocket knife to carefully cut the inner cap off being careful to not harm the threads.
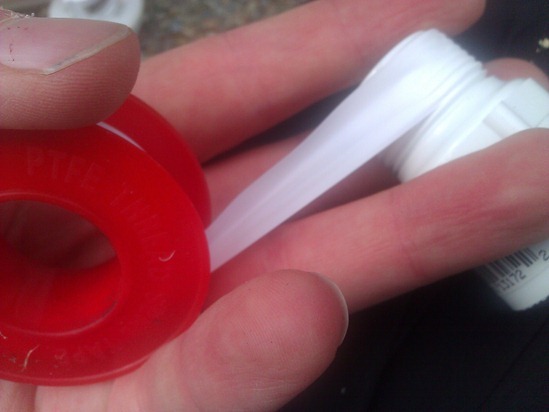
Next I applied some silicon tape to the 3/4 in. Male Terminal Adapter and screw these into the lids and then attached the lid back into the water barrel. Repeat this step for each of the barrels.
Next cut two 1.5 inch lengths of 3/4 PVC pipe and place between the 3/4 in. Male Terminal Adapter and the 3/4“ PVC T connector.
Now cut two 2 inch lengths of 3/4” PVC pipe and place at either end of the T connector on both barrels.
Next attach your 3/4” PVC ball valve to both ends (or 3/4” PVC end cap if you are not planning on adding any more barrels to your system.)
Finally measure the length between the remaining span of your water barrels and cut that to length.
Once you have everything fit as you like it use PVC primer/cement to make everything permanent except the connections between the T-connector and the threaded connector attached to the barrel.
Now (with PVC assembly removed) flip the barrels over to their final resting place and prime/cement last connections giving barrels a slight twist to make sure you have a good seal in the PVC cement.
Next cut a hole in the top of one barrel and be sure to place a screen between the rainspout and the opening of the barrel to keep mosquitos from making a home in your barrel.
In each of the other barrels you will need to add a hole for venting. I will I completely forgot this step and woke up confused why only one barrel contained 90% of the water after our first rain. Once I drilled a 1/4” hole into my second barrel I got a good blast of air in my face and the barrels equalized.
Lastly you need to add an overflow preventer, for this I drilled a one inch hole and then added a Hose Barb Adapter (5/8” Barb X 3/4” MIP) and a small length of 5/8” plastic tubing returning to the drain (with screen attached to keep bugs from coming up the tube.
To make sure you do not have any leaks (and being so excited to see your hard work in action) you can throw your onto your roof and let the water run for a few minutes to make sure you do not have any obvious issues such as leaks at any of your connections.
 |
 |
I also added a 3/4 in. Slip x MHT PVC Fitting which allows me to directly connect a garden hose or automated drip irrigation system (see upcoming post..)
So now I have the ability to capture up to 110 gallons of water, since I am only capturing one half of the water from the roof of my garage which equates to 196 square feet. Given for every inch that falls on a square square foot of surface area equals 0.6234 gallons so this means with just a single inch of rain these barrels will be over flowing providing weeks of water for a small vegetable garden.


11.2 years ago
[…] summer I setup some cheap rain barrels which I describe in this post which worked great though had one major flaw. If you wanted to do some maintenance or add any […]